GMI Launchpad - IPFS Files
1. Introduction
GMI Marketplace Launchpad is a service which enables NFT (Non-Fungible Token) creators to quickly and efficiently deploy their NFT collection contract on the Energi blockchain and then set up a site where community members can visit to mint their NFTs.
Your Own Smart Contract: Every NFT collection you start on GMI Marketplace gets its own ERC721 smart contract on the Energi blockchain. This non-custodial approach ensures that you, and only you, manage your collections' funds and decisions. We have 2 kinds of smart contracts - (a) Standard NFT Contracts and (b) Refundable NFT Contracts.
Security Comes First: Buy and sell NFTs on the GMI Marketplace with confidence. The NFT collection owners receive Guaranteed Royalties and Powerful Anti-Theft Protection on the Energi blockchain.
For All Kinds of Projects: GMI Marketplace is versatile. You can set up a DAO, launch an app with NFT access, create a collection of digital art, or set up a fundraising event.
2. Create IPFS Files
There are 2 types of files that need to be created and set up:
- NFT Images: An NFT image is a digital representation of an image that is stored on a blockchain and made up of a unique code. This code is made up of metadata and identifiers that make the NFT one-of-a-kind. NFTs can be associated with various file formats, including JPEG or PNG.
- NFT Metadata: NFT metadata is a JSON representation of a non-fungible token (NFT) that provides descriptive information about it. It's like a digital label or certificate of authenticity that gives collectors insight into the NFT, such as its creator, creation date, and unique attributes.
2.1. Set Up Your Art
2.1.1. Prepare Your Images
- Create a folder named
imageson your computer. - Name your images to correspond with token IDs ranging from 1 to maxSupply. For example, for a collection of 1000 NFTs, name them from 1 to 1000.
- For this guide, we will use a smaller collection of 5 NFTs to illustrate how to set up the collection.

2.1.2. Upload images to IPFS
- Create a free account at https://filebase.com.
- After logging into your account, create a bucket. The bucket helps organize your collection. In our example, we will create a bucket called
example 1

- Click and open the bucket called
example 1. - Upload your
imagesfolder intoexample 1.
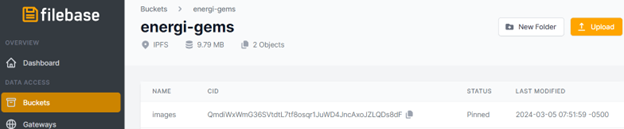
- Once all the images are uploaded, you will see a CID (Content Identifier) of the
imagesfolder. Copy the CID and store it in a text editor. You will need it in the next section.
2.1.3. Create Metadata Files
- On your computer, create a folder called
metadata. - Create a JSON file following the structure noted below. Replace YOUR_CID_FROM_ABOVE with the CID you copied in the previous step.
- Add attributes unique to the art.
- Save it as 1.json on your computer.
Ensure that the file extension for each image (e.g., .jpg, .jpeg, or .png) matches the format used in your IPFS CID path. This helps to avoid mismatches when linking to your NFT images.
{
  "name": "My First NFT #1",
  "description": "This is my first NFT ever!",
  "image": "ipfs://YOUR_CID_FROM_ABOVE/1.png",
  "attributes": [
    {
      "trait_type": "Color",
      "value": "Blue"
    },
    {
      "trait_type": "Terrain",
      "value": "Mountainous"
    },
    {
      "trait_type": "Skyline",
      "value": "Misty"
    },
    {
      "trait_type": "Weather",
      "value": "Partly Cloudy"
    }
  ]
}
2.1.4. Duplicate and modify the Metadata
Duplicate 1.json for each NFT in your collection, naming each file according to its token ID (e.g., 1.json, 2.json, 3.json, etc.).
Modify each file to reflect the correct token ID and image link. For example, 5.json would look like this:
{
  "name": "My First NFT #5",
  "description": "This is my first NFT ever!",
  "image": "ipfs://YOUR_CID_FROM_ABOVE/5.png",
  "attributes": [
    {
      "trait_type": "Color",
      "value": "Green"
    },
    {
      "trait_type": "Terrain",
      "value": "Rocky"
    },
    {
      "trait_type": "Skyline",
      "value": "Dusk"
    },
    {
      "trait_type": "Water",
      "value": "Murky"
    }
  ]
}
2.1.5. Prepare Metadata for Upload
Ensure all metadata files have no file extension (e.g., remove .json)

2.1.6. Upload Metadata to IPFS
Upload your folder of metadata files to Filebase, similar to how you uploaded the images.
Copy the CID of this metadata folder.
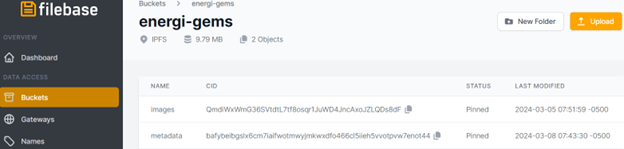
The CID of the metadata folder defines the baseURI. You will use this when creating your collection. The baseURI will be of the form: ipfs://YOUR_METADATA_FOLDER_CID/
3. Create and Deploy NFT Smart Contract
We have templates to create 2 types of NFT contracts:
4. Your NFT Collection Mint Site
5. List Your NFT on GMI Marketplace
For more details and to get started with your own 80% Refundable NFT project, visit:
If you need any help, contact our support team.